
Why This 7-Day Alta Via 1 Itinerary Is Different
After seeing countless photos and videos of Alta Via 1 on social media, I knew I wanted to experience it for myself. However, most itineraries I found took 10–11 days and involved staying in shared dormitories, neither of which appealed to me.
I wanted to hike Alta Via 1 in a single week and have a private room every night. So I planned a route that made both possible while still including what I believe are the most spectacular sections of the trail. If you’re looking for a comfortable, first-timer-friendly way to experience the Dolomites, this itinerary is for you.
What Is Alta Via 1?
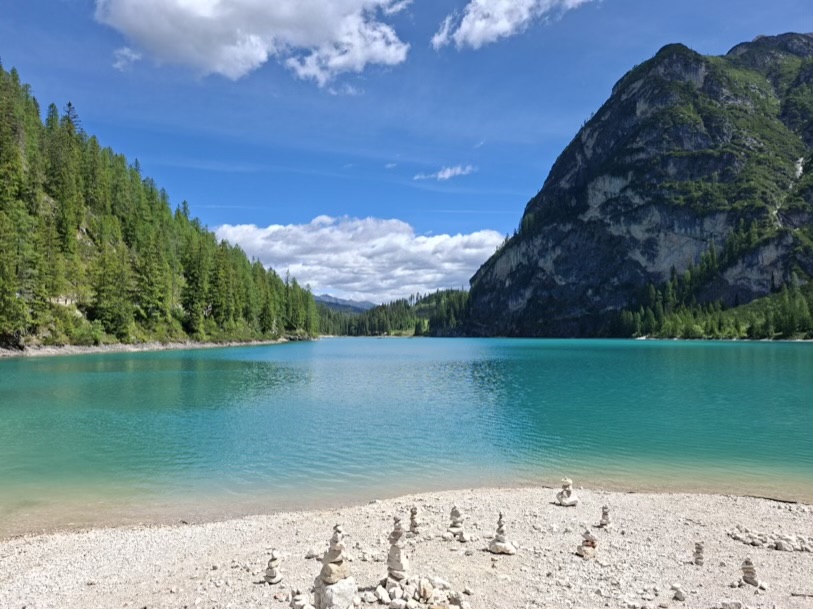
Alta Via 1 is a 125 km hiking trail in the Italian Dolomites, running from Lago di Braies to La Pissa near Belluno. It’s one of Europe’s most famous hut-to-hut treks, known for its dramatic scenery and mountain rifugios.
The full route usually takes 10–11 days, but you don’t need to complete it to enjoy it. With different access points and variants, Alta Via 1 can be done in a week or even just a few days.
When to Hike Alta Via 1
The hiking season on Alta Via 1 runs from mid-June to the end of September.
I hiked the route in June, and it was especially beautiful with wildflowers in full bloom across the valleys and alpine meadows. However, some snow can still remain on higher sections depending on the year.
July and August are the busiest months, with warm weather but also the most crowds. September tends to have more stable weather, fewer people on the trail, and clearer conditions, though days are shorter.
How Long Does Alta Via 1 Take?
The classic Alta Via 1 route takes around 10–11 days to complete.
However, it can be done faster or slower depending on your fitness level and how you want to structure the trip. Some very experienced hikers complete it in 6 days, but this is extremely demanding and not something I would recommend unless you are used to long alpine stages. It involves very long days, significant elevation gain, and little room for flexibility. It can also become risky, as afternoon storms are common in the Dolomites, so it’s important not to plan late arrivals at rifugios.
There are also shorter variants, including a 4-day northern section from Lago di Braies to Cortina or a 6-day southern section from Cortina to Belluno. Many people also choose to start at Lago di Braies and finish earlier using one of the exits along the route.
For my trip, I chose a 7-day itinerary ending at Passo Duran. This allowed me to complete a full week of hiking while focusing on the most scenic sections of Alta Via 1. I also finished before the final Belluno section, which does not have private room accommodation in the rifugios.
Booking Rifugios and Private Rooms
Bookings for Alta Via 1 rifugios usually open between September and November, but the exact timing varies from hut to hut. Some of the most popular rifugios, especially those offering private rooms like Lagazuoi, can sell out very quickly once reservations open, so it is crucial to book early.
Each rifugio is booked separately, either through their website, by email, or sometimes by phone. In most cases you’ll need to wait for a confirmation reply, which can take a day or more. I booked almost all rifugios online without issues, with the exception of Rifugio Sennes.
A deposit of around 50% is typically required to secure your reservation. Make sure to double-check dates and your route before confirming, as you are responsible for ensuring each night is correctly planned along the trail.
What to Pack for Alta Via 1
The most important thing when packing for Alta Via 1 is to travel light, as you will carry everything on your back for the entire week.
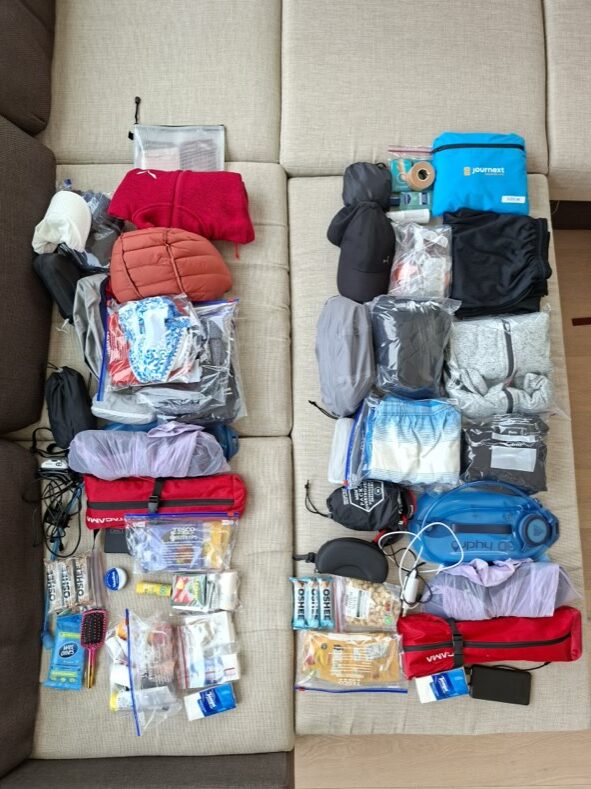
My backpack was a 30+3 litre pack and weighed around 7 kg without water and hiking poles. Water is the biggest variable and it can easily add around 1.5 kg or more depending on how much you carry between rifugios, so keep this in mind when planning your load. A water bladder is very convenient here as it makes it easier to sip regularly while walking and helps distribute weight more comfortably compared to bottles.
For clothing, I brought 3 pairs of underwear and socks, 2 T-shirts, one pair of long trousers, one pair of shorts, a fleece jacket, a waterproof jacket, a sun hat, and sunglasses. I also packed lightweight clothes for the rifugios along with basic toiletries.
Layering is essential as mountain weather can change quickly even in summer, with warm sunshine in the valleys and much colder and windier conditions at higher altitude.
Some rifugios require you to bring your own towel and sleeping liner so it is worth checking this in advance for each stay.
Other essentials include a headtorch, blister kit, medication, and snacks.
Hiking poles are highly recommended as they make long descents much easier on the knees. One important detail is that they are not allowed in carry-on luggage so you will need to either check your backpack or buy them in Italy.
Finally do not underestimate the sun as SPF 50 is essential at altitude even on cooler or cloudy days.
Getting to Lago di Braies
Lago di Braies is the most common starting point for Alta Via 1 and is relatively easy to reach, but it does require some planning.
The closest airport is Venice.
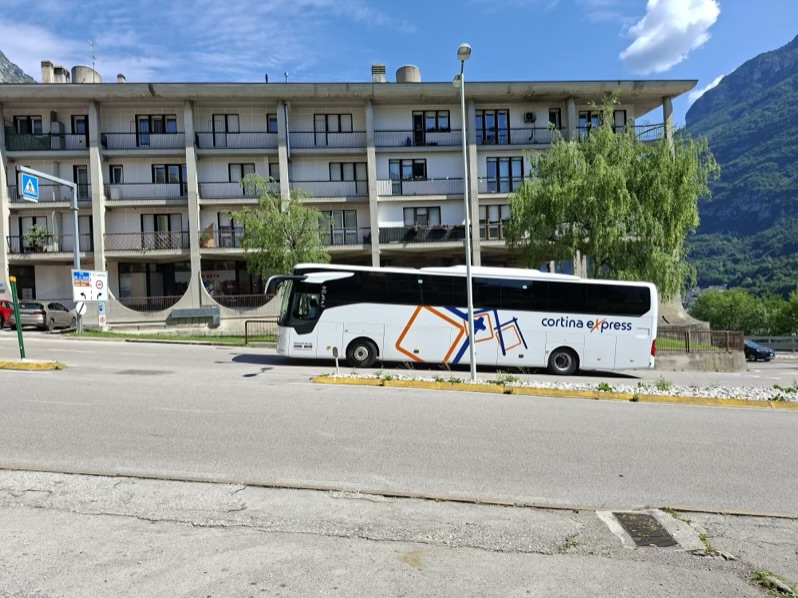
From Venice, take the Cortina Express bus to Cortina d’Ampezzo. The journey takes around 2 hours and tickets should be booked in advance, especially in high season.
From Cortina, continue to Dobbiaco. You can take either another Cortina Express bus or Dolomiti Bus 445.
From Dobbiaco, take bus 442 to Lago di Braies. In high season, tickets should be booked online in advance. In early and late season, they can usually be bought on the bus, and in low season tickets are purchased directly on board.
Where to Stay the Day Before
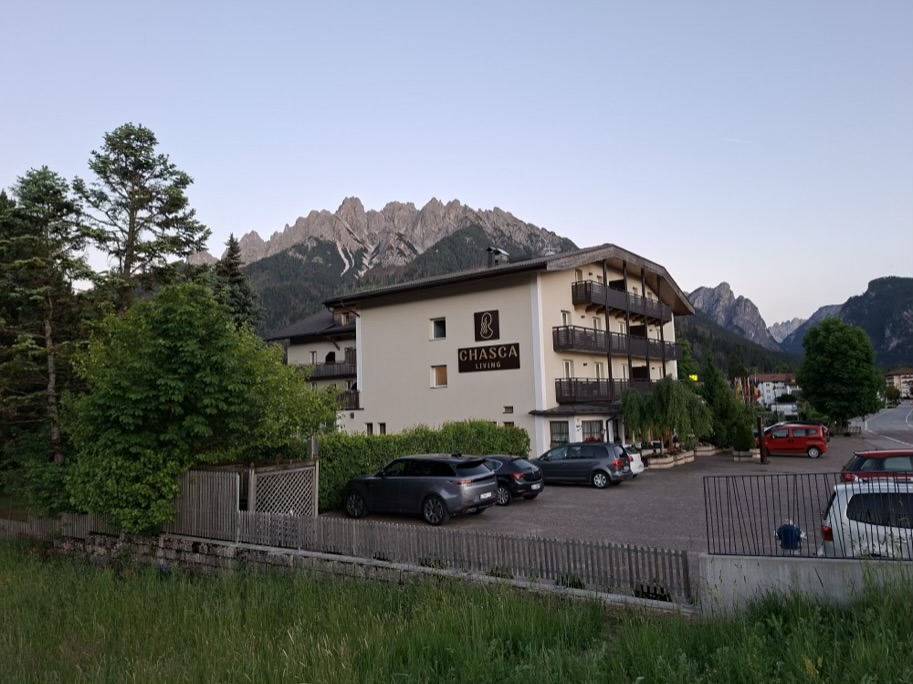
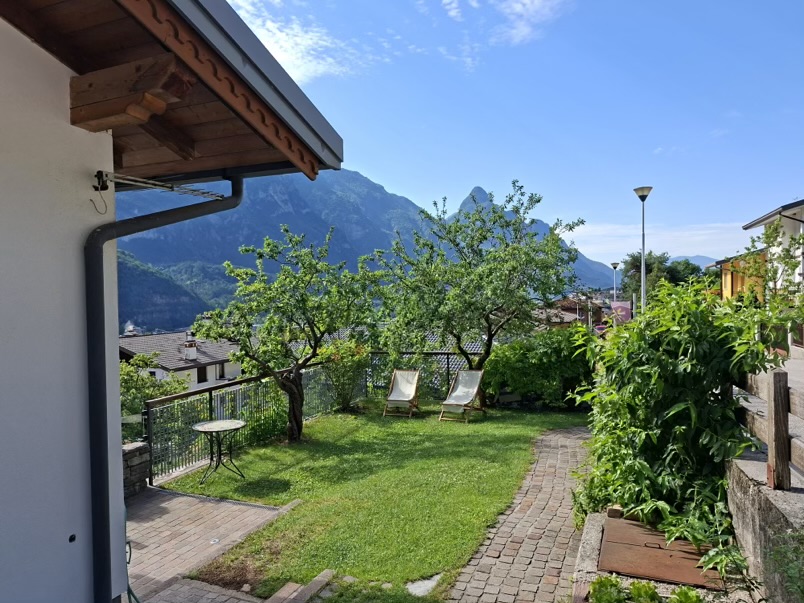
I stayed in Dobbiaco so that on the first day of hiking we only needed one short bus connection to reach Lago di Braies.
Hotel Chasca is a great option. It is comfortable, reasonably priced, and has a spa area with a heated pool, which is perfect for relaxing after travel. You can book directly on their website.
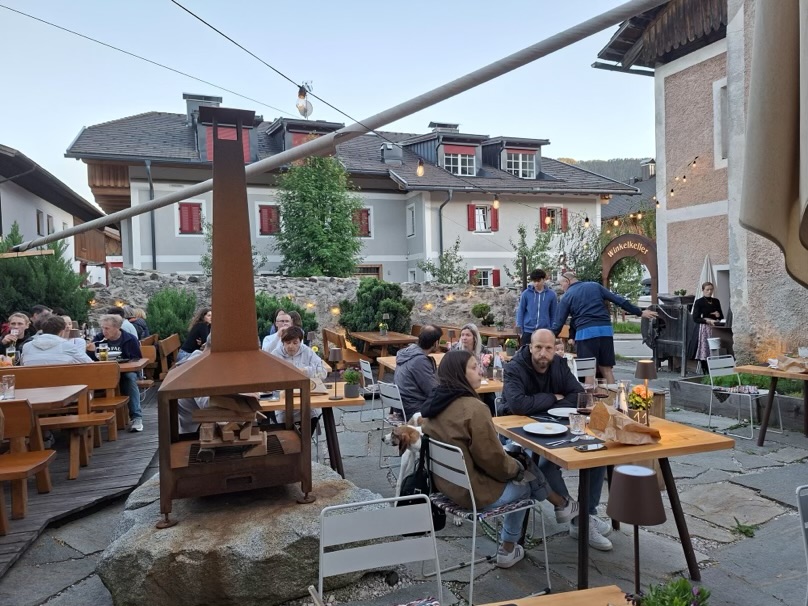
For dinner, Restaurant Winkelkeller is an excellent choice. It serves delicious local food and has a nice outdoor seating area. It is about a 15 minute walk from Hotel Chasca, making it an easy and relaxed way to end the day before starting the hike.
My 7-Day Alta Via 1 Itinerary
Here is a quick overview of the full route before going into each day in detail.
| Day | Route | Distance | Time | Ascent |
|---|---|---|---|---|
| 1 | Lago di Braies → Rifugio Sennes | 9.5 km | 4h 20m | 910 m |
| 2 | Rifugio Sennes → Rifugio Fanes | 10 km | 4h | 570 m |
| 3 | Rifugio Fanes → Rifugio Scotoni | 10 km | 3h 45m | 420 m |
| 4 | Rifugio Scotoni → Rifugio Averau | 12 km | 6h 15m | 1100 m |
| 5 | Rifugio Averau → Rifugio Passo Staulanza | 16 km | 6h 15m | 430 m |
| 6 | Rifugio Passo Staulanza → Rifugio Vazzoler | 15 km | 6h | 780 m |
| 7 | Rifugio Vazzoler → Passo Duran | 12 km | 4h 45m | 560 m |
For route planning, I relied heavily on the Cicerone Alta Via 1 Trekking in the Dolomites guidebook by Gillian Price, which I found to be the most useful resource when preparing for the hike.
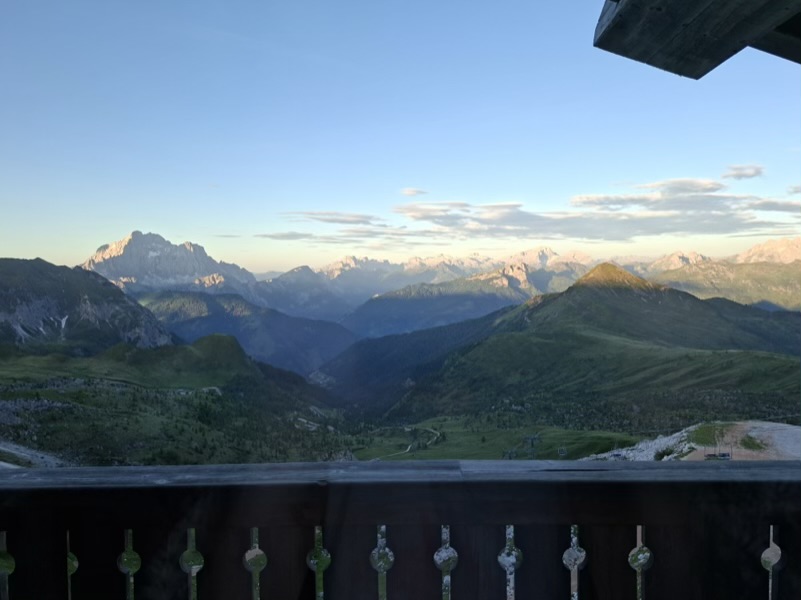
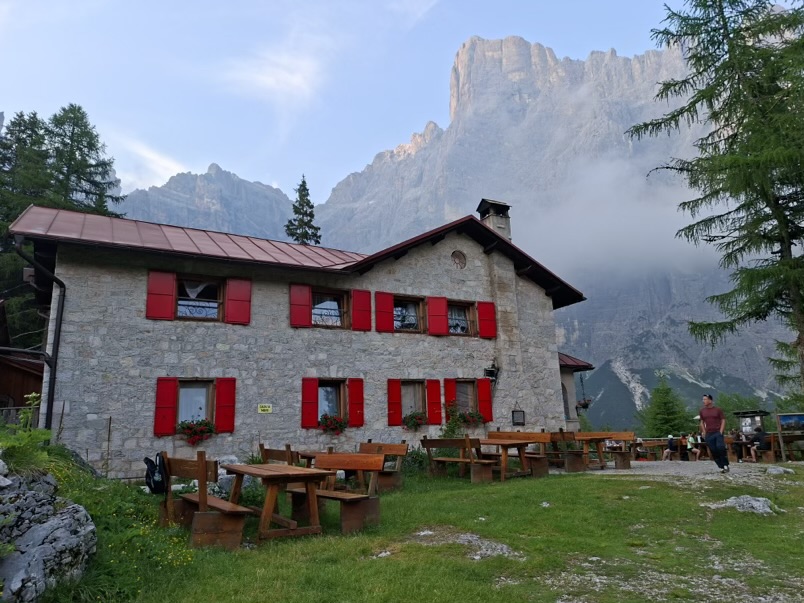
Day 1: Lago di Braies to Rifugio Sennes (via Rifugio Biella)
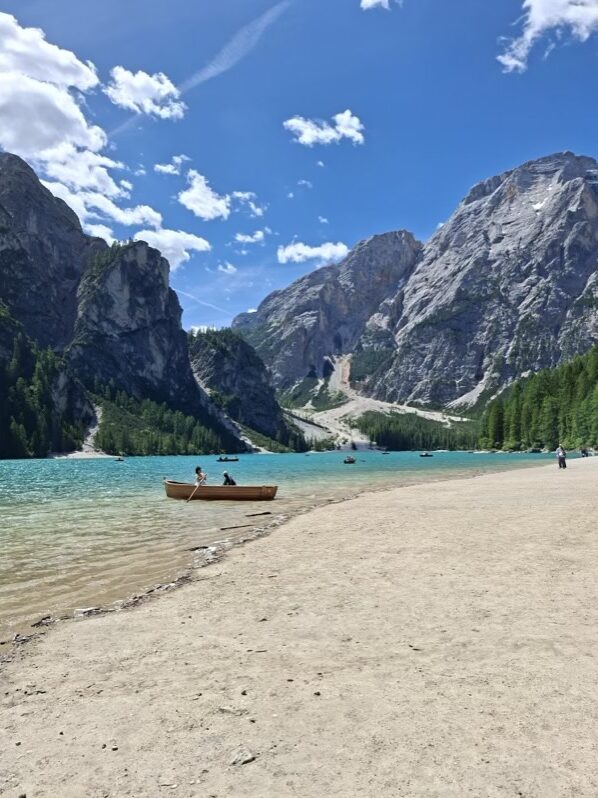
The first day is all about ascent. The hike starts at the iconic Lago di Braies, where you follow the lake along its southern shore before the climb begins. From the very start, you are rewarded with beautiful views over the lake and the surrounding Dolomites, even as the ascent quickly begins.
From here, you gain around 900 metres of elevation in one continuous effort. It is a challenging introduction to Alta Via 1, but it sets the tone for the days ahead and is well worth the effort.
The climb continues all the way to Rifugio Biella, which sits at the top of the ascent. It has basic facilities and is a good place to take a break and refuel before continuing. There are no private rooms or showers here, which is why I did not stay and continued on to Rifugio Sennes.
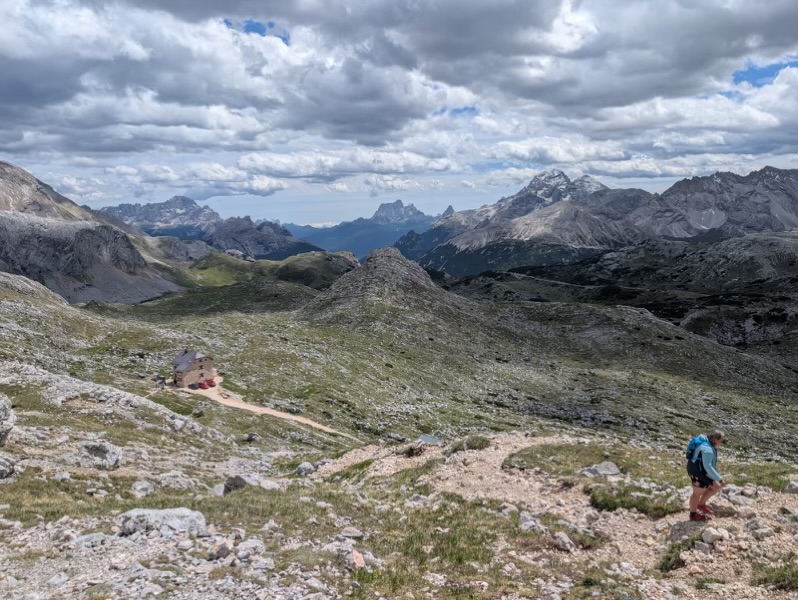
From Biella, it is about another hour of mostly flatter hiking to Rifugio Sennes. This final section feels noticeably more relaxed, and you start to get a sense of the wider alpine plateau landscape. Keep an eye out for marmots along the trail, especially in the quieter sections.
After a challenging first day, Rifugio Sennes provides a comfortable and well-earned first night on the trail.
Route map: View the Day 1 route on Komoot
Day 2: Rifugio Sennes to Rifugio Fanes (via Rifugio Pederü)
The second day is slightly shorter and less demanding thanks to a much smaller elevation gain. The route is naturally split into two parts, with a stop at Rifugio Pederü after around 1.5 hours of descent.
The first section is a long downhill hike towards Pederü. The final part is particularly steep, following a zig-zag road, and is where you will be grateful for having hiking poles. On this last steep section you can already see Rifugio Pederü in the valley below, which makes the descent feel much more manageable.
By the time you reach Rifugio Pederü, it is usually too early for lunch service, but they still offer a selection of sandwiches, cakes, and drinks, which can be enjoyed on a terrace with beautiful mountain views.
From Pederü, the second part of the hike begins. This section is mainly uphill and gradually brings you into the Fanes area before reaching Rifugio Fanes.
The stage ends in the beautiful Fanes valley, one of the most scenic overnight locations on the route.
A 10–15 minute walk away is Rifugio Lavarella, home to the highest brewery in Europe. It is worth visiting for a beer after dropping off your backpack, and marmots can often be spotted from the terrace.
Route map: View the Day 2 route on Komoot
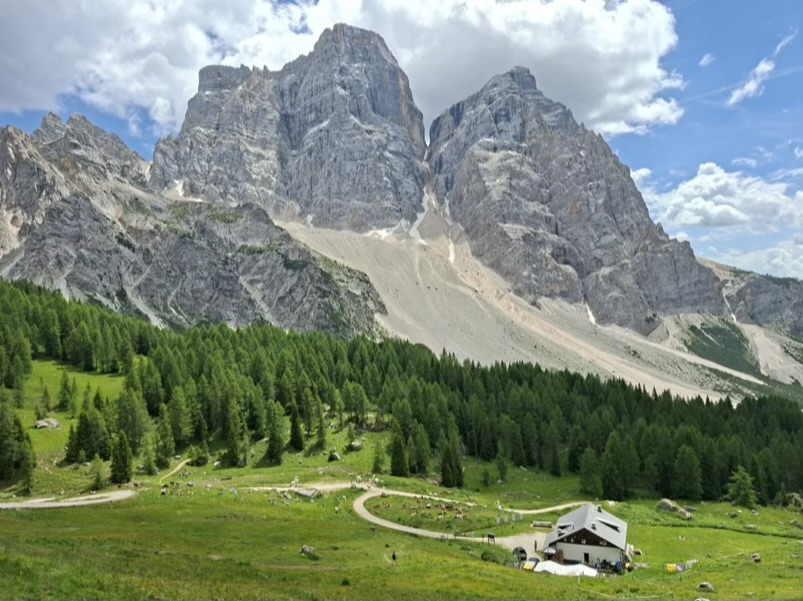
Day 3: Rifugio Fanes to Rifugio Scotoni
I originally planned to stay at Rifugio Lagazuoi, but the private rooms were fully booked, so I stayed at Rifugio Scotoni instead. This turned out to be one of the highlights of the trip.
The downside is that Scotoni sits slightly off Alta Via 1, adding around 40 minutes to the route. It also creates a shorter Day 3 at the expense of a longer and more demanding Day 4. If you book early and want to avoid the tougher following day, Lagazuoi is the better option.
The hike from Fanes to Scotoni starts with a short but steep uphill section, followed by a long and mostly flat and enjoyable stretch with great views.
The final third is more demanding. It begins with a long and steep descent, followed by an equally steep ascent. After the descent, there is a restaurant along the route, Restaurant Capanna Alpina, which is the only hut you will pass during the day.
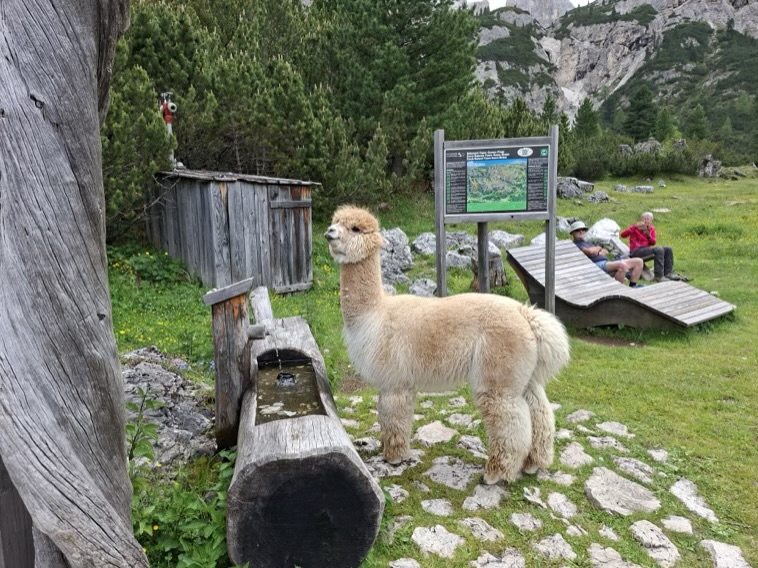
The reward for the effort is Rifugio Scotoni, beautifully located beneath towering mountains, with alpacas often roaming nearby. If you stop here for lunch, the mixed grill for two is one of the rifugio’s signature dishes.
Route map: View the Day 3 route on Komoot
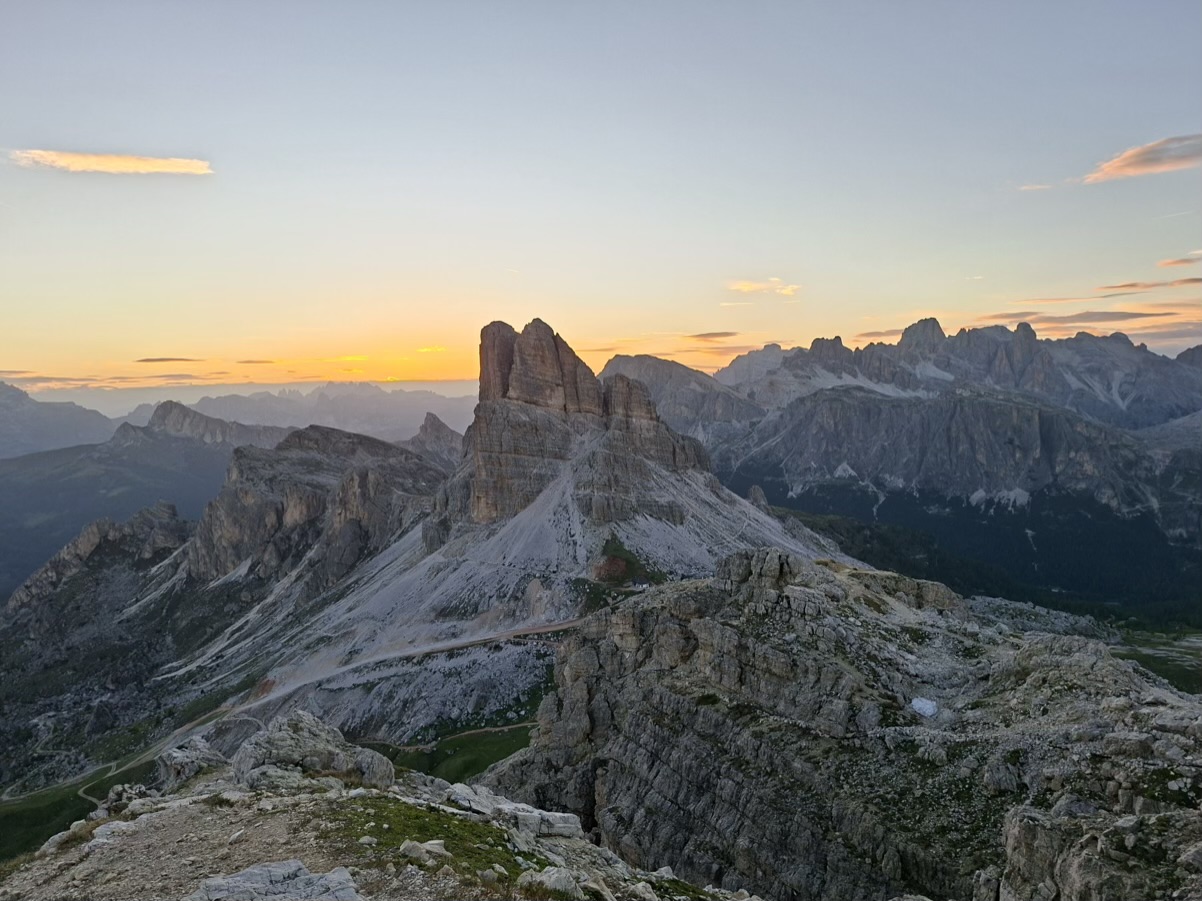
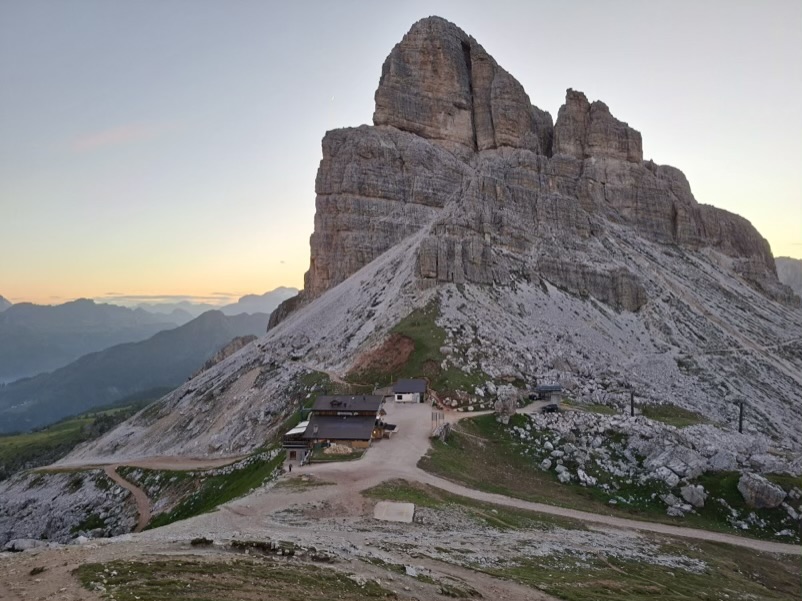
Day 4: Rifugio Scotoni to Rifugio Averau (via Lagazuoi & Passo Falzarego)
This was one of my favourite days on Alta Via 1. The day starts with a 2.5-hour ascent to Rifugio Lagazuoi, the highest point on the route. Starting early helps as temperatures are still mild.
My route includes an optional 30-minute extension to the Piccolo Lagazuoi summit, which is well worth it for the extra views over the Dolomites.
From Lagazuoi, the descent to Passo Falzarego follows the historic First World War tunnels. This is one of the most unique sections of the entire route and offers a fascinating glimpse into the area’s history. A headtorch is essential due to the lack of lighting, and the terrain is steep, wet, and uneven. A helmet is recommended, although not essential for most hikers.
At Passo Falzarego, there is a café and shop, which is a good place for a short break before the final climb.
From here, it is a 1.5-hour ascent to Rifugio Averau. The climb is steep and demanding, with some sections requiring use of hands. The rifugio only appears at the very end, making the arrival especially rewarding.
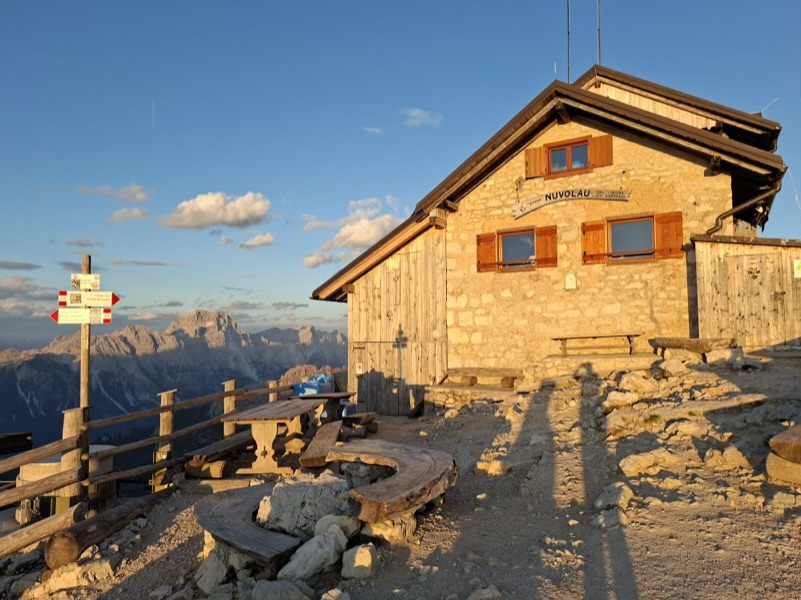
From Rifugio Averau, Rifugio Nuvolau is clearly visible on the peak above. After settling in, I hiked up for sunset without my backpack. The climb takes less than 30 minutes and watching the sun set over the surrounding peaks was one of the highlights of the entire trip.
Route map: View the Day 4 route on Komoot
Day 5: Rifugio Averau to Rifugio Passo Staulanza (via Passo Giau & Rifugio Città di Fiume)
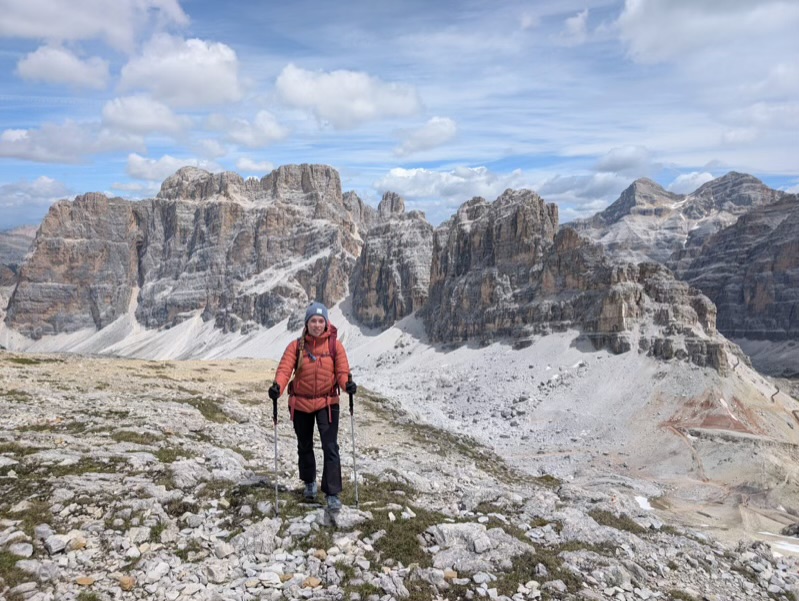
Day 5 was the first day I really started feeling the challenge of Alta Via 1. It is the longest day so far at almost 16 km, but with only 430 metres of elevation gain. After the long ascents of Day 4, this is a welcome change of rhythm.
The day begins with a one-hour descent to Passo Giau. The initial section is very steep and rocky, and you need to use your hands in places. I found myself checking the map multiple times to confirm the route, as it was the first time on the trail where the descent felt this technical.
At Passo Giau, there is a rifugio right by the road, but after only one hour of hiking I did not stop for long.
From there, a very scenic section leads towards Rifugio Città di Fiume, which takes around four hours. The trail is more relaxed and offers continuous views, especially of Monte Pelmo.
After around five hours of hiking, Rifugio Città di Fiume is a welcome sight. It is a great place for lunch if you did not bring a packed meal from Averau, and the approach to the rifugio with Monte Pelmo in the background is particularly beautiful. Cows roam freely around the rifugio, which adds to the atmosphere.
Since Città di Fiume does not offer private rooms, I continued for another hour along Alta Via 1 to Rifugio Passo Staulanza.
After almost 16 kilometres on the trail, Rifugio Passo Staulanza marks the end of a long but rewarding day.
Route map: View the Day 5 route on Komoot
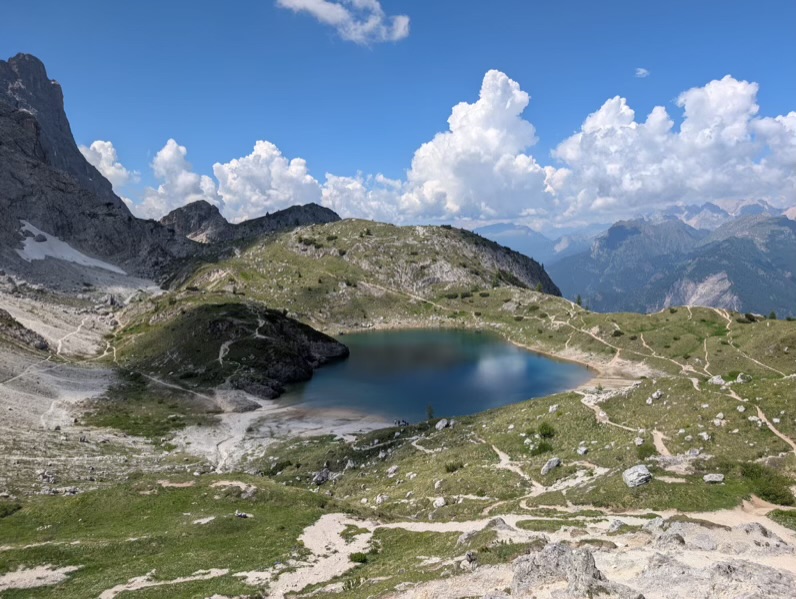
Day 6: Rifugio Passo Staulanza to Rifugio Vazzoler (via Rifugio Coldai)
This was my second favourite stage of Alta Via 1 thanks to the stunning views of Monte Civetta and Lago Coldai.
The day begins gently, first along an asphalt road and then a gravel track with a gradual incline. Don’t be fooled by the easy start though, as this is one of the bigger ascent days of the route. After around 2.5 hours, you reach Rifugio Coldai, which is a great place to take a break and grab a drink or a snack after the long climb.
A short climb beyond the rifugio brings you to Lago Coldai, one of the most beautiful lakes on Alta Via 1. If you’re feeling brave, you can take a swim in its icy water or simply cool your feet. Surrounded by mountains and overlooked by the imposing Monte Civetta, it is well worth spending some time on the shore before continuing.
From the lake, the trail follows the mountainside beneath Monte Civetta, offering some of the most spectacular views of the entire hike. The route undulates with a series of smaller climbs and descents, but there are no major ascents after Lago Coldai.
An optional detour to Rifugio Tissi adds around 30 minutes of hiking and is known for its dramatic viewpoint over the Civetta wall. I chose to skip it and save my energy for the extended final day, continuing directly towards Rifugio Vazzoler instead.
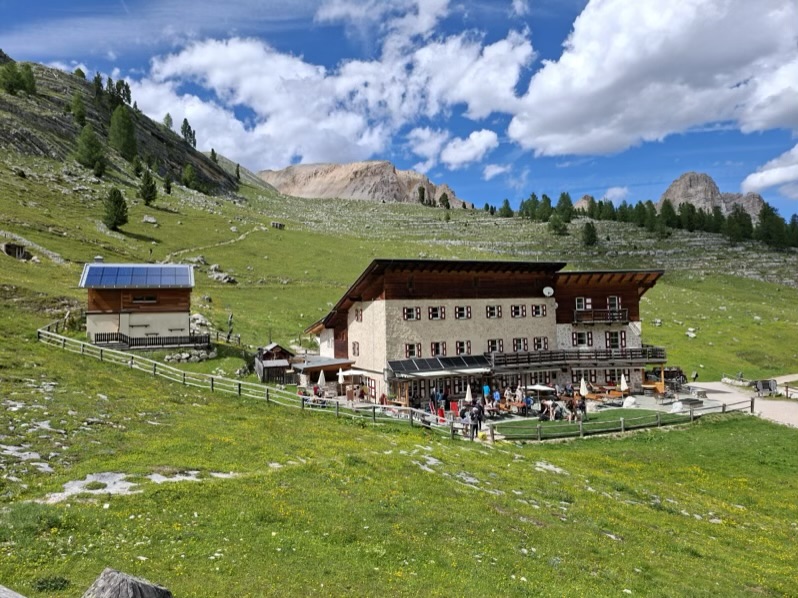
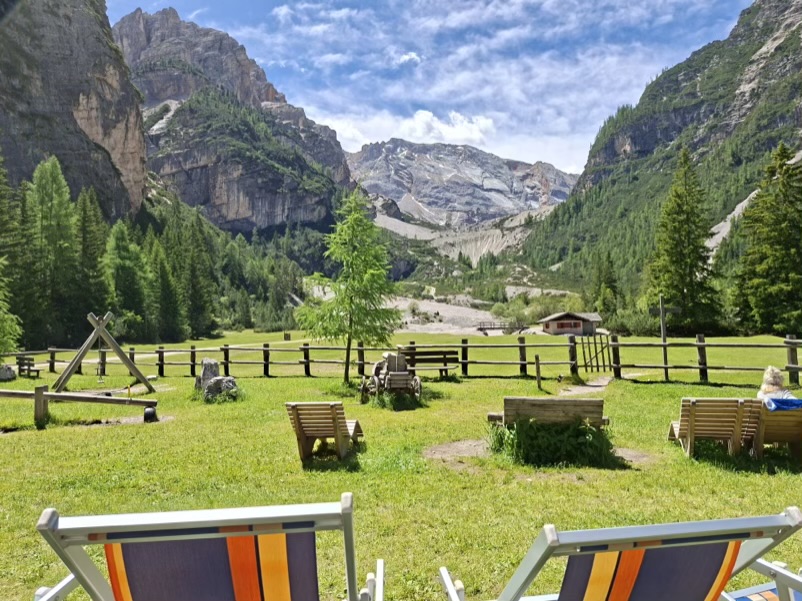
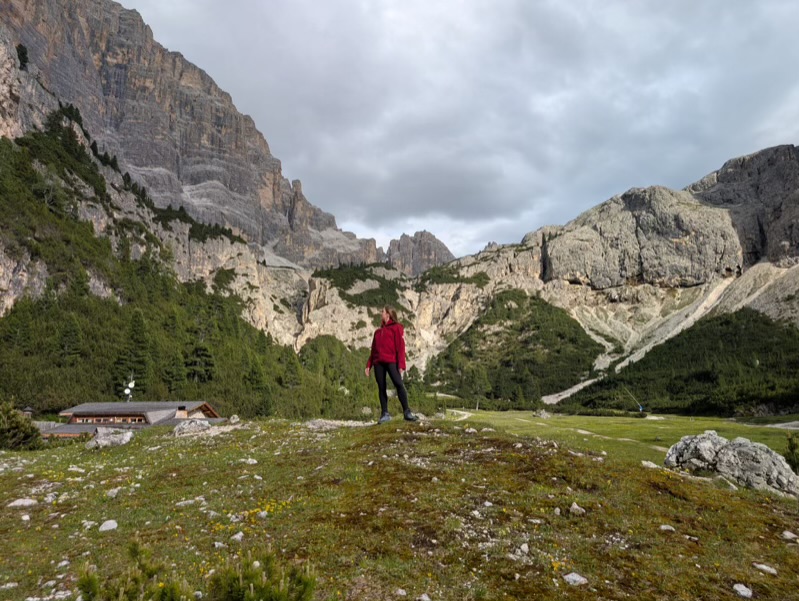
Rifugio Vazzoler sits in a beautiful valley beneath dramatic peaks and provides a peaceful base before the final day of hiking.
Route map: View the Day 6 route on Komoot
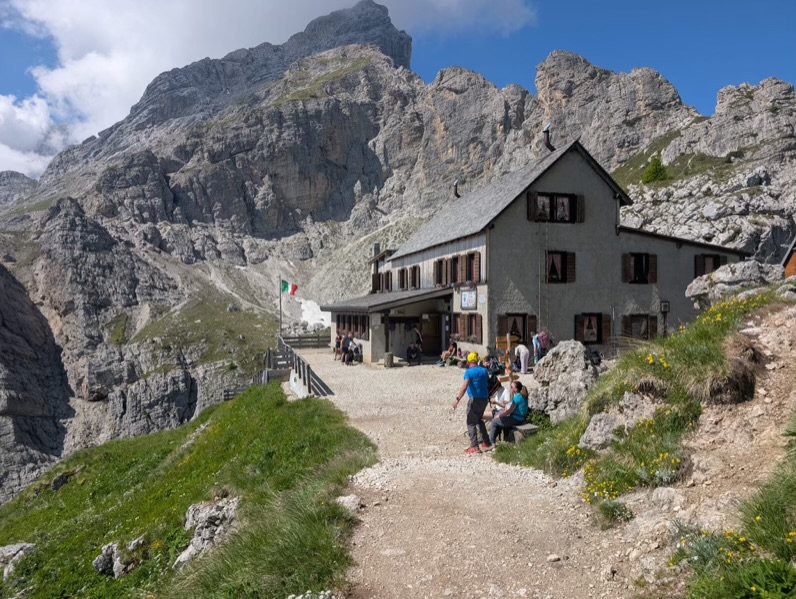
Day 7: Rifugio Vazzoler to Passo Duran (via Rifugio Carestiato)
This is the final day of Alta Via 1 in this itinerary, although hikers with more time can continue for another two or three days to complete the full route.
The hike to Rifugio Carestiato takes around four hours and is one of the more demanding sections of the trail. There is a significant amount of elevation gain, and the terrain is often rocky and uneven, with large roots and boulders requiring careful footing. The first couple of kilometres pass quickly along a gravel road, but progress slows considerably once the trail becomes steeper and more technical.
This was the only section of Alta Via 1 where I found the route-finding occasionally challenging. Signage was less frequent than elsewhere, and in some rocky sections the path was not always obvious.
After the challenging climb, Rifugio Carestiato is a welcome sight and an excellent place to stop for lunch before the final descent.
From there, it is a straightforward 45-minute walk down to Passo Duran, where this itinerary officially comes to an end.
In my case, I decided to continue hiking for another 2.5 hours to Forno di Zoldo rather than taking a taxi from Passo Duran. It is a decision I quickly started to question. After a week on the trail, my knees and feet were beginning to feel the accumulated effort, and the extra distance felt much harder than it looked on the map.
The route to Forno di Zoldo follows mainly forest trails. The shade provided welcome protection from both the afternoon sun and later rain, but if you are happy to spend a little extra on a taxi, I would not recommend extending the hike. By this point in the week, most hikers will have earned an easier finish.
Route map: View the Day 7 route on Komoot
The Rifugios: Honest Reviews of Every Private Room
To make comparisons easier, I’ve added an overall rating out of 10 for each rifugio. This is based on comfort, food, location, and overall experience, with a focus on private room stays.
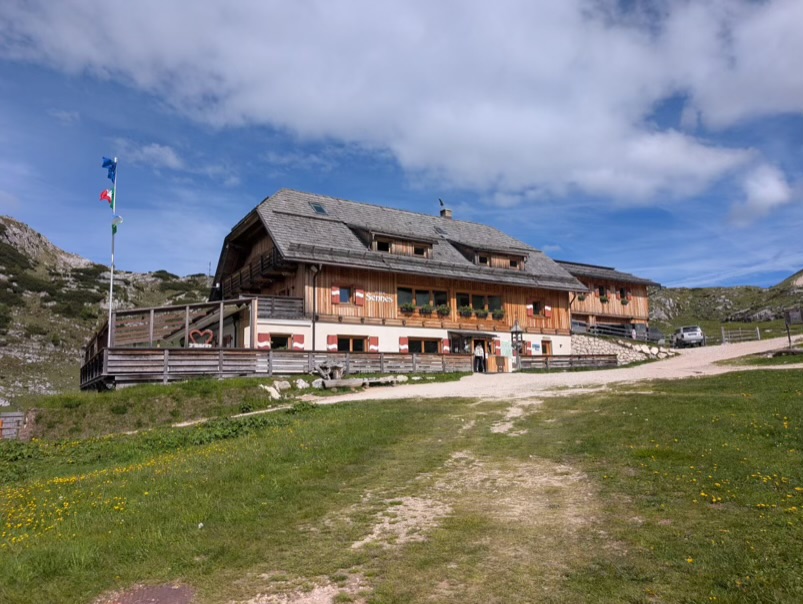
Rifugio Sennes – 8/10
Rifugio Sennes offers simple private rooms and good value for the area. Only a small number have private bathrooms, which were fully booked in my case, so I shared a bathroom on the first night.
Bathrooms are shared per floor with one male and one female section. Basic amenities such as towels, soap, sockets, and a hairdryer are provided.
Breakfast is included, while dinner is à la carte. Wi-Fi is available and works reasonably well.
Booking was the main downside, as communication was difficult and required local help to secure a reservation. Despite this, everything worked smoothly on arrival.
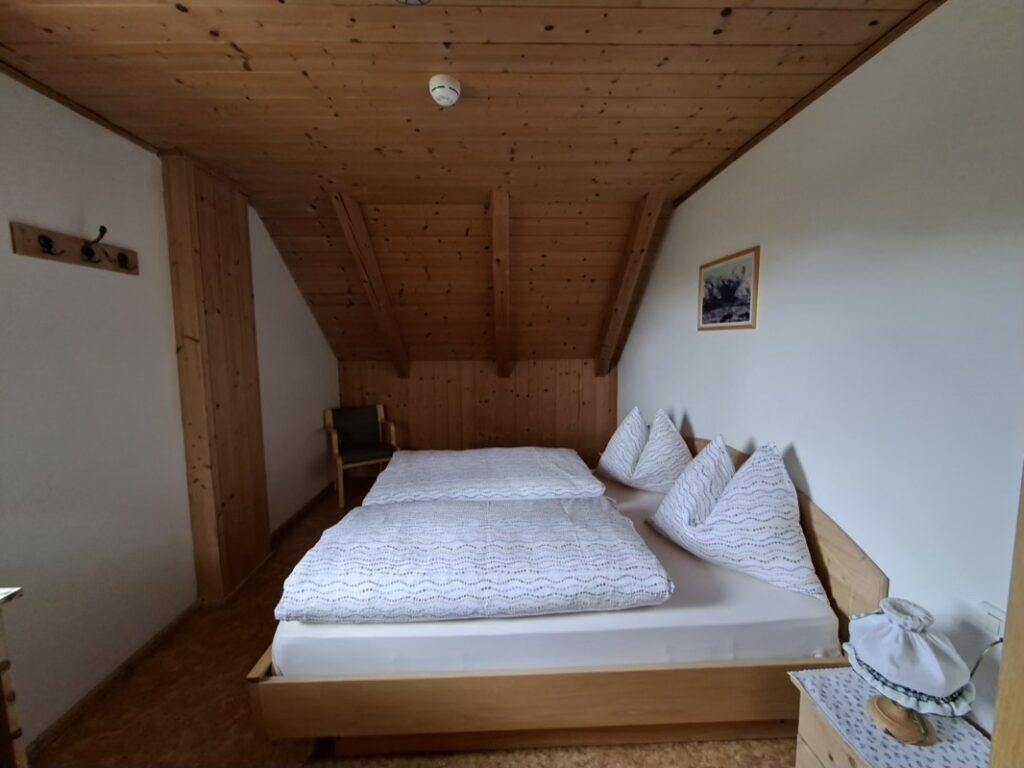
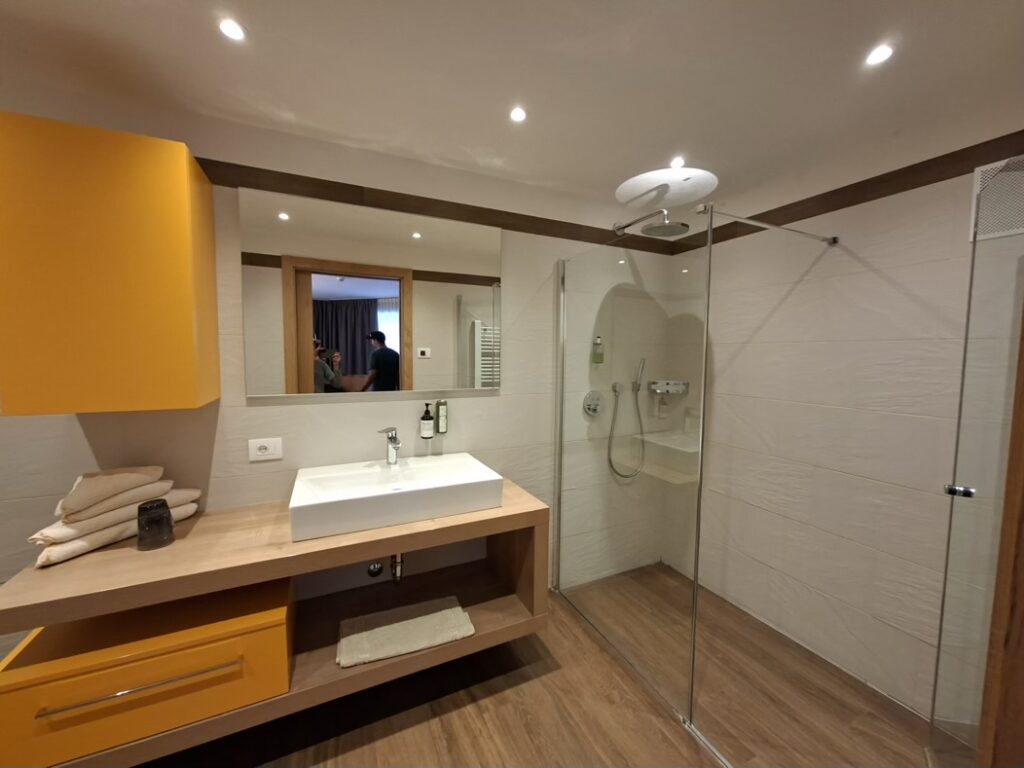
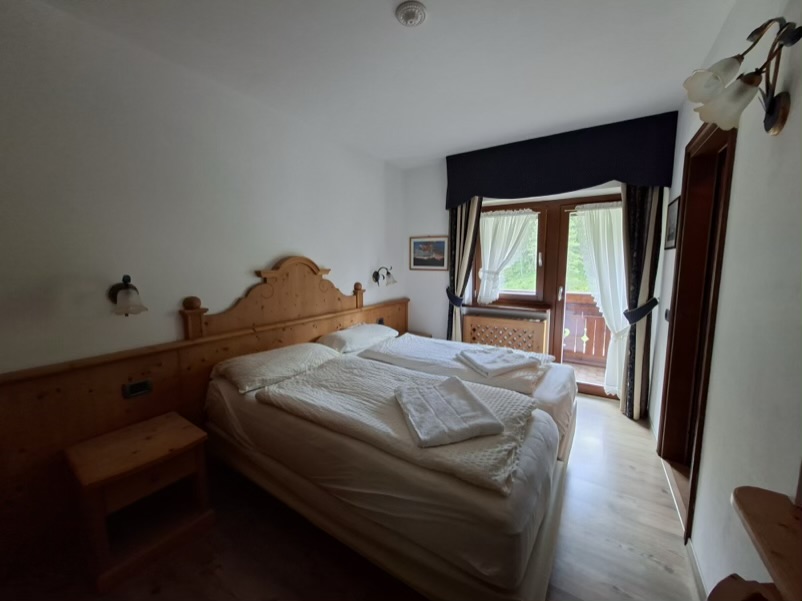
Rifugio Fanes – 9/10
Rifugio Fanes was the most comfortable stay on Alta Via 1. Private rooms are large with king-size beds and spacious bathrooms, and feel closer to a hotel than a mountain hut.
Dinner is included and generous, with the option of seconds for pasta. The rifugio is well equipped, including a washing machine and heated drying room.
It is set in a beautiful valley with a river and lake, which is one of its biggest highlights. Wi-Fi is available but can be inconsistent in rooms further from reception.

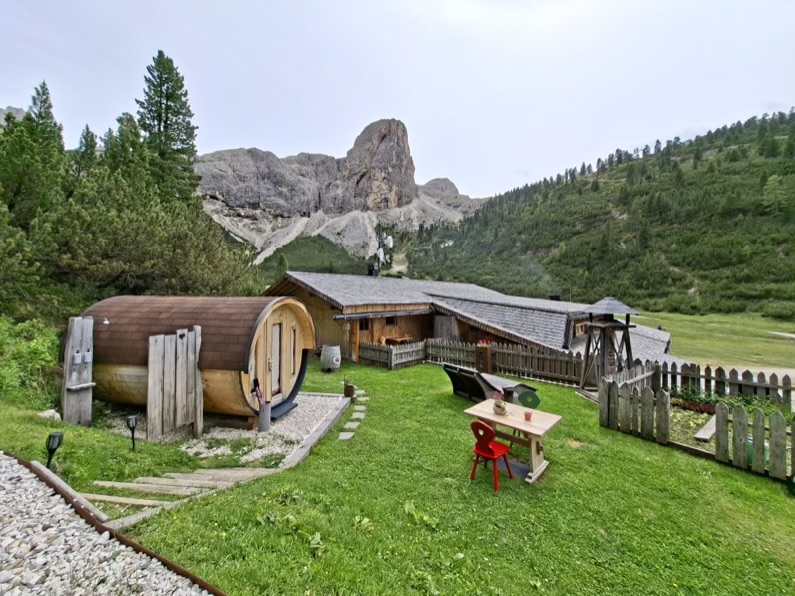
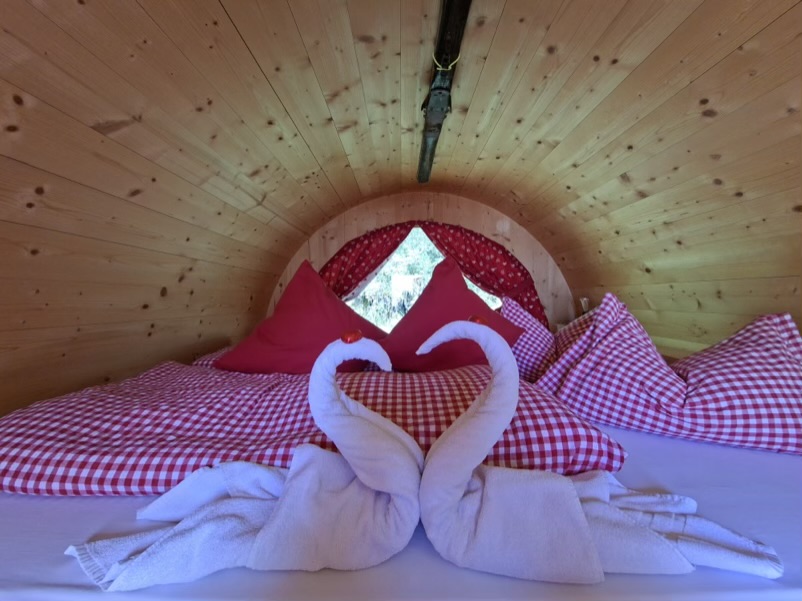
Rifugio Scotoni – 10/10
Rifugio Scotoni stands out for its unique barrel accommodation with a private hot tub and outdoor shower in a secluded garden area.
The setup feels private and well designed, with loungers, evening lighting, and excellent attention to detail. The barrel includes everything needed, such as sockets, lighting, robes, and a hairdryer.
Toilets are shared in the main building. Wi-Fi and mobile reception are good, and local bottled water is provided.
This was the most expensive stay, but also the most memorable and unique.
Rifugio Averau – 9/10
Rifugio Averau sits at over 2,400 metres and offers some of the best views on the route. It is also one of the most expensive rifugios.
Dinner is à la carte and was one of the best meals of the trip. Tap water is not potable.
Rifugio Nuvolau is clearly visible above and is worth the short sunset hike if weather allows.
Breakfast is excellent with a wide selection, including pastries, savoury options, and table service for coffee.

Rifugio Passo Staulanza – 5/10
Rifugio Passo Staulanza feels more like a roadside hotel than a mountain rifugio despite offering en-suite rooms.
Several aspects felt overly commercial, including high prices for water, expensive laundry services, and inconsistent food quality. Laundry is not allowed in rooms and must be paid as a service, which felt restrictive compared to other rifugios. Service was also slow and at times unfriendly.
At breakfast, food often ran out and was not replenished quickly. Overall, this was the weakest stay of the trip.
Rifugio Vazzoler – 7/10
Rifugio Vazzoler is the most basic rifugio on the route but still a solid mountain experience.
Rooms are small and simple, with shared bathroom facilities. Showers require a €3 token for 3 min of hot water, and a sleeping liner is required as sheets are not changed between guests.
Wi-Fi is available for a fee but can be unreliable. Staff are helpful with weather and transport information.
Meals are communal, creating a more social atmosphere than in other rifugios. The outdoor area with mountain views is a highlight.
What It’s Really Like Staying in a Rifugio
Meals

Breakfast usually started between 7:00 and 7:30 am and lasted around 1.5 hours. Most hikers arrived as soon as it opened, making the dining room busiest at the start of service.
Dinner was typically served between 6:00 and 7:00 pm, and guests were expected to arrive within a set time window, even when meals were à la carte. Tables were allocated by room and, apart from Rifugio Vazzoler, dining felt less communal than I expected, often resembling a hotel restaurant.
Half-board dinners usually consisted of three courses, with a choice of two primi and two secondi, followed by dessert. Drinks were charged separately, although alcohol was generally inexpensive by UK standards.
Check-In and Check-Out
Check-in was typically from 2:00 pm, while check-out was much earlier than in most hotels, usually between 8:30 and 10:00 am.
Early starts are encouraged as afternoon thunderstorms are common in the Dolomites. As a rule of thumb, it is best to arrive at your rifugio between 2:00 and 4:00 pm and keep an eye on the forecast.
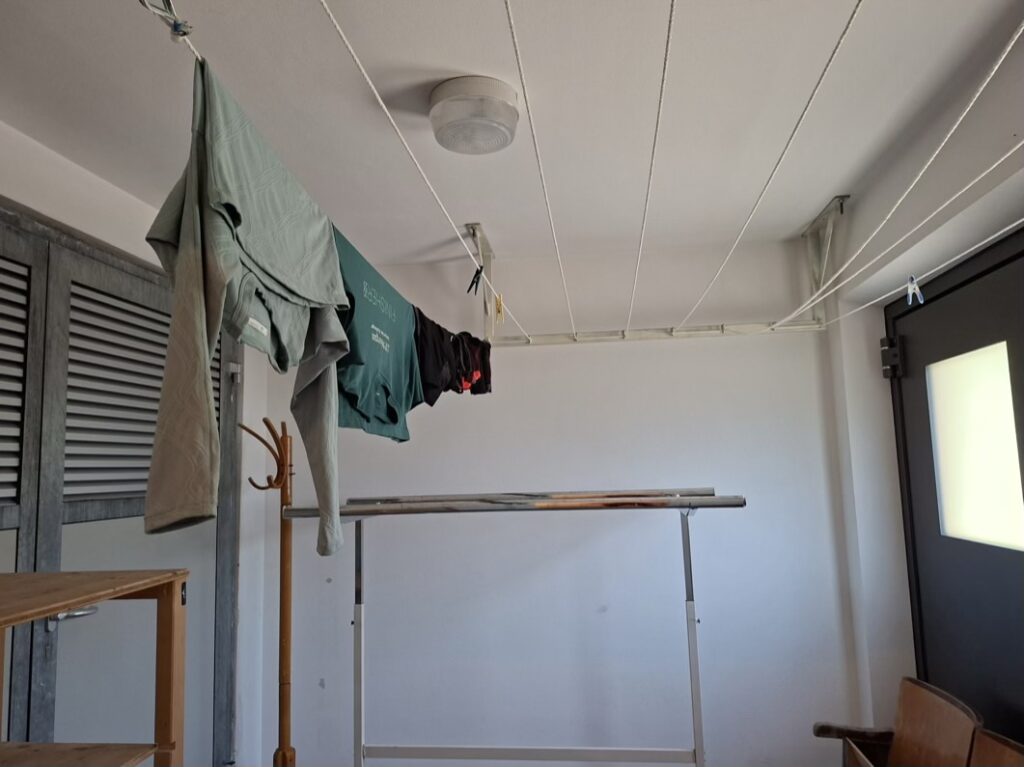
Laundry
Laundry quickly becomes part of the routine on a week-long hike. Some rifugios have washing machines, but hand washing is often necessary. Drying facilities ranged from simple outdoor lines to dedicated drying rooms.
Rifugio Fanes had the best setup, including a heated drying room. The only exception was Rifugio Passo Staulanza, which prohibited laundry in rooms and charged €25 for a laundry service.
Rooms and Facilities
Most private rooms included bed linen and towels. The exception was Rifugio Vazzoler, where a sleeping liner was required because linen is not changed between guests.
Most rifugios also provided basic toiletries, although it is worth bringing your own just in case. I was pleasantly surprised that every rifugio had power sockets and access to a hairdryer, making it easy to charge devices and freshen up after a long day.
Getting Back from Passo Duran
If you finish the Alta Via 1 at Passo Duran, the return journey requires a bit of planning.
From Passo Duran, there is no direct public transport connection, so the most straightforward option is a taxi to Dont (around €45 with Zoldo Taxi, which should be booked in advance). From Dont, bus 25 continues to Longarone, which is the main connection point for onward travel.
If you plan to use public transport in this area, it is important to carefully check bus timetables, especially at weekends. Services are less frequent, and the last buses often run earlier than on weekdays.
From Longarone, you can then reach Venice Marco Polo Airport in about one hour via Cortina Express.
Optional Final Hike: Passo Duran to Forno di Zoldo
In my case, I chose to continue hiking from Passo Duran to Forno di Zoldo instead of taking a taxi. This extended the final stage to over 20 km and made it a very demanding last day after several days on the trail.
Where to Stay After the Hike
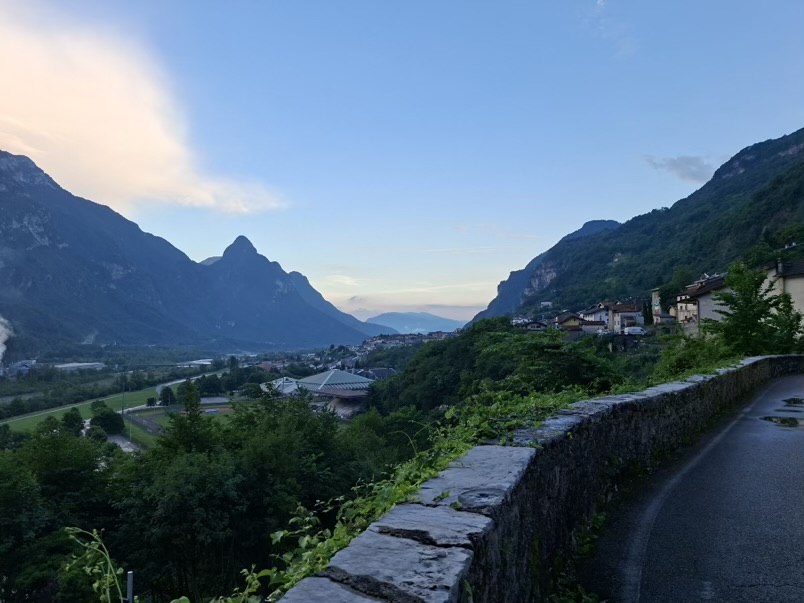
For a final overnight stay, Longarone works well as a base before heading to Venice.
A great option is B&B Casa Guilda, around a 15-minute walk from the bus stop. The rooms are spacious and comfortable, the hosts are very welcoming, and there is a garden where you can relax after finishing the hike. Breakfast is included and excellent.
It is also very good value (around €100 for a double room in June), with high-quality accommodation for the price. It can be booked via bed-and-breakfast.italia with free cancellation.
How Much Does Alta Via 1 with Private Rooms Cost? (2026 Prices)
This breakdown is based on a 7-day Alta Via 1 itinerary with private double rooms (prices per person, sharing a room) during the summer season.
Rifugio Accommodation
| Accommodation | Cost |
|---|---|
| Rifugio Sennes | €90 |
| Rifugio Fanes | €145 |
| Rifugio Scotoni (Barrel) | €220 |
| Rifugio Averau | €175 |
| Rifugio Passo Staulanza | €137 |
| Rifugio Vazzoler | €83 |
| Total | €850 |
Accommodation Before and After the Hike
| Accommodation | Cost |
|---|---|
| Dobbiaco (pre-hike) | €135 |
| Longarone (post-hike) | €75 |
| Total | €210 |
Other Costs
| Item | Cost |
|---|---|
| Buses | €50 |
| Lunches, snacks and drinks | €200 |
| Total | €250 |
Total Estimated Cost
| Category | Cost |
|---|---|
| Rifugio accommodation | €850 |
| Additional accommodation | €210 |
| Transport | €50 |
| Food, snacks and drinks | €200 |
| Grand Total | €1,310 |
This itinerary cost approximately €1,300 per person excluding flights.
The biggest cost driver is accommodation. Private rooms significantly increase the overall cost compared to dormitory stays, but for me the extra comfort was well worth it. A proper bed, privacy, and a hot shower at the end of a long hiking day made the experience far more enjoyable.
Final Thoughts: Is Alta Via 1 Worth It?
Alta Via 1 is a beautiful hike with gorgeous views that constantly change, so it never feels repetitive. The rifugios, especially in the northern section, are charming and the food is generally excellent, which makes for a very rewarding overall experience.
However, it is physically demanding and the effort should not be underestimated, especially if you are not used to hiking with a heavy backpack. Proper preparation for the daily elevation gain and terrain is essential.
Choosing private rooms makes this a more expensive trip, but in my opinion the added comfort is worth it, particularly for anyone who is not comfortable sharing dorm style accommodation with strangers. A proper bed and a hot shower after a long day of hiking feel like a real luxury in this context.
Leave a Reply